
BATHROOM RENOVATION
Our DIY bathroom remodel in 2022-23. It all began with a leaky shower…

The original toilet which we hated to death, glass shelving, tub and tile. Notice the faucet setup that we drastically changed.

Original pillar, glass and tile. This is the point of the leak.

Original small shower niche, tile and hardware. Another issue in this design is the tile not going to the ceiling. This created a horizontal line that made the bathroom ceiling appear lower than it was.

Original shower glass separating the shower and bathtub. The pony wall seams between the tile was another leak point as over time the grout wore through.

We tore down the shower pony wall first as it was the source of the leak - look at that wood!

The wood had been badly warped by the water and humidity. One push and it all came down. The tile was literally holding it together.

We were surprised the column held up at all - these were 2x4's!

Next step was to tear down the rest of the walls and remove the previous insulation

Removing the old insulation

We originally planned on keeping the shower floor tile in place as we weren't planning on doing an entire remodel

But we decided to remove that too. Down to the cement which we proceeded to break apart and remove.

The shower was then completely gone, right down to the sub flooring. This allowed us to increase the shower footprint by 4".

We eventually tore down all the walls in the bathroom. This was the sink.

As the only toilet in the house, we left the it to the very end, even as we removed the sink

New plumbing moved the show head to the middle of the increased footprint and raised the shower head by over a foot.

New drywall through the bathtub area, we had to use this tub through the renovation. At one point we were filling buckets in the kitchen and dumping them into the tub. It takes 7 buckets and we now have stronger shoulders.

Rebuilding the pony wall and column

The new column is stronger, plumb and....

of course it's perfectly level

We increased the size of the shower niche and centered it within the shower. Originally it was towards the shower wall.

We decided to use Kerdi board to waterproof the shower. It's an amazing product that is light and easy to work with. It's more expensive but replaces hot mopping.

Full Kerdi board shower

Instead of having to hot mop the shower pan a premade Kerdi pan is placed on the floor
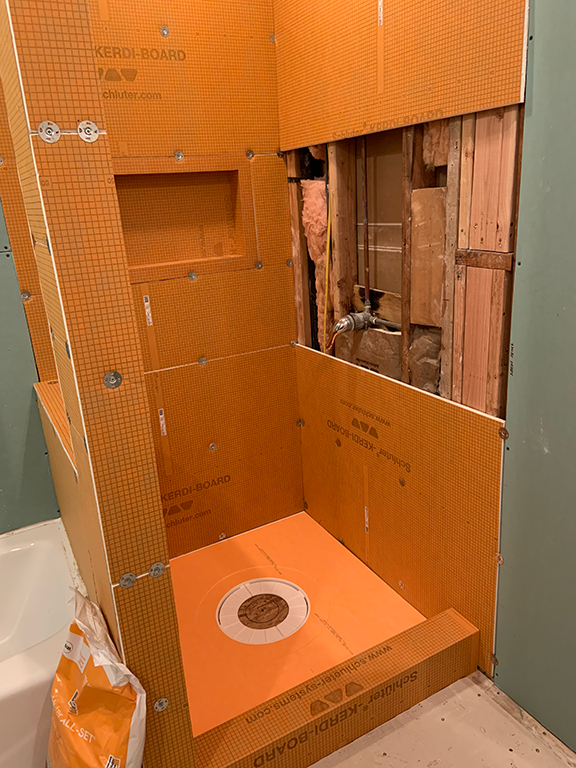

We also made a pony wall opposite the bathtub with plans on installing wood shelving above

This new pony wall will house the plumbing and of course, completely level. Pipe access will move from a door in the kitchen to under the first shelf, behind the pony wall.

We replaced all the insulation and added it where there wasn't, replaced all the drywall, taped, mudded and sanded without removing the toilet.

Sealed Kerdi board in the shower

Including the walls, niche and floor
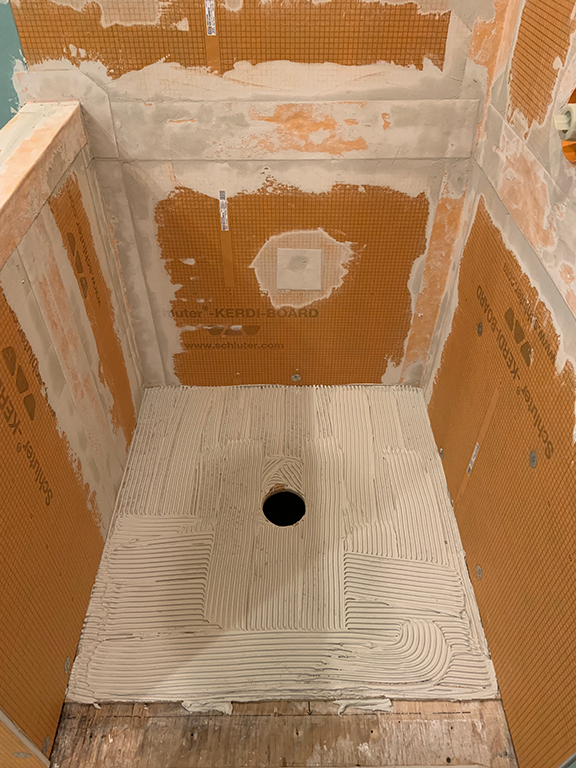
Simple adhesive to install the pan. Faster, cleaner and cheaper than old school hot mopping.

We plugged the drain and filled the base with water for 24hrs to test water proofing. No leaks gives us the go ahead to start tiling

There were some larger flat areas where we could use the tile on a mat BUT half of them had to be done individually.

The end result is pretty cool - half cut stone floor
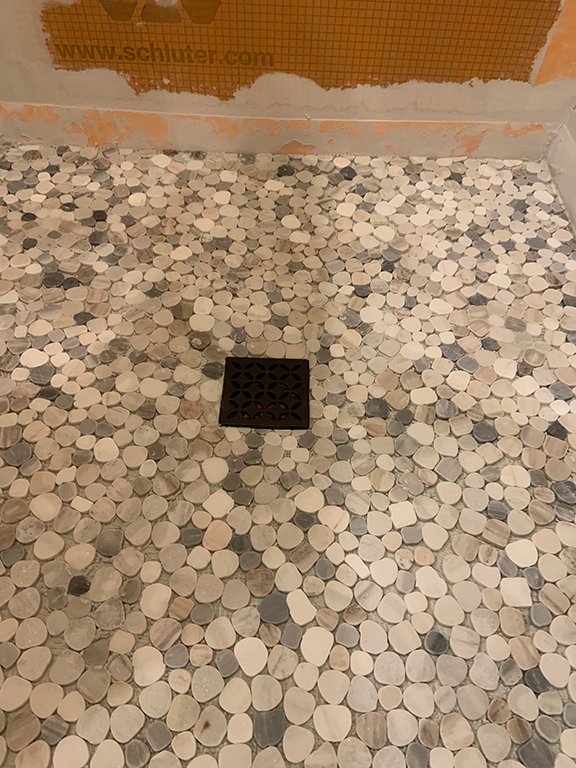
Closeup photo of the final tile shower floor minus the grout. For the floor grout we used marine epoxy to stay strong underwater.

At this point we've gone as far as we could without removing the toilet and remaining floor. Out with the old...

What seemed like days of mixing all-set in the backyard. We went through about 10 buckets. 5 mins of mixing, 5 mins off, 3 mins of mixing, repeat.

We used literal self leveling lasers to align our tile with the floor.

Applied adhesive and back butter on every tile - so many tiles.

We worked from the pony wall left, then the row above and the row below in order to get the only toilet we had back in place that day.

At the end of the day we finished enough of the wall to put the toilet back in - whew!

We then had to tile the long wall into the shower and the shelving

Consistently using the yellow spacers to keep distance and flatness the same

Working our way into the shower and our new shower niche

Once the two walls were done, we turned our sights onto the floor. This is so the pillar tile can sit on top of the floor. We scraped all the old floor and adhesive but left the cement backer.

A roll of ditra was set in place on top of the cement board in order to allow level, cushioned flooring installation

Then set one row at a time of fragile Travertine

Of course picking out the distinct patterns and colouring all along the way. Once in, the floor would be allowed to dry, then grouted and sealed.

Once the floor was in and dry, we were able to install our new toilet. Soft closing, eco friendly flushing and of course smooth sides. I love this because it allows easy cleaning. It's also slightly taller to the seat and shorter to the top of the basin.

Back to tiling the pillar and shower pony wall. It's super important to make sure the tile lines up with the tile on the wall. To me anyway.

Using painters tape to keep the cut tiles from falling and the ledge tile from moving

Cutting holes in the tile after it was installed was my least favorite part of the job. Constantly afraid of cracking the new tile and this tile was super fragile.

How accurate are the lines from one wall to the other? Nearly perfect :)

The final challenge of the white tile was hanging single long pieces upside down

We used clamps and posts to apply pressure while the adhesive dried. I ate a lot of grout while applying upside down

Our shower wall has unique wood patterns and we used the living room floor to align the pattern we wanted. Cato is not very impressed but doing his typical micro managing.

Covering the tile shower floor, we began setting the shower wall tile

From floor to ceiling using the same leveling system as the other walls

The end result looks pretty cool, almost like wood

Our absurdly expensive teak vanity needed some customization (of course). We had to drill holes in the back and cut away the back opening to align with our studs for the correct height. More holes in the tile too.

Once up, the marble vanity was put in place. it almost looks like a bathroom!

Add the black plumbing and handles to the vanity

We used birch for all the trim and shelving as the grain and colouring, once stained, closely matched the teak vanity

We glued the heavy mirror to the wall and used tape and braces while it dried

The final step was the built in wooden shelving. A lot of planning, leveling and more holes in the tile.

Basic framework of three evenly spaced shelves. I used 1/4" poplar in order to get the right height that matched the 2" window trim

Along with corner and diagonal supports each shelf can hold about 75lbs comfortably, probably more like 100lbs.

1/2" Birch plywood for the top of the shelf and a 2" solid birch face were glued together
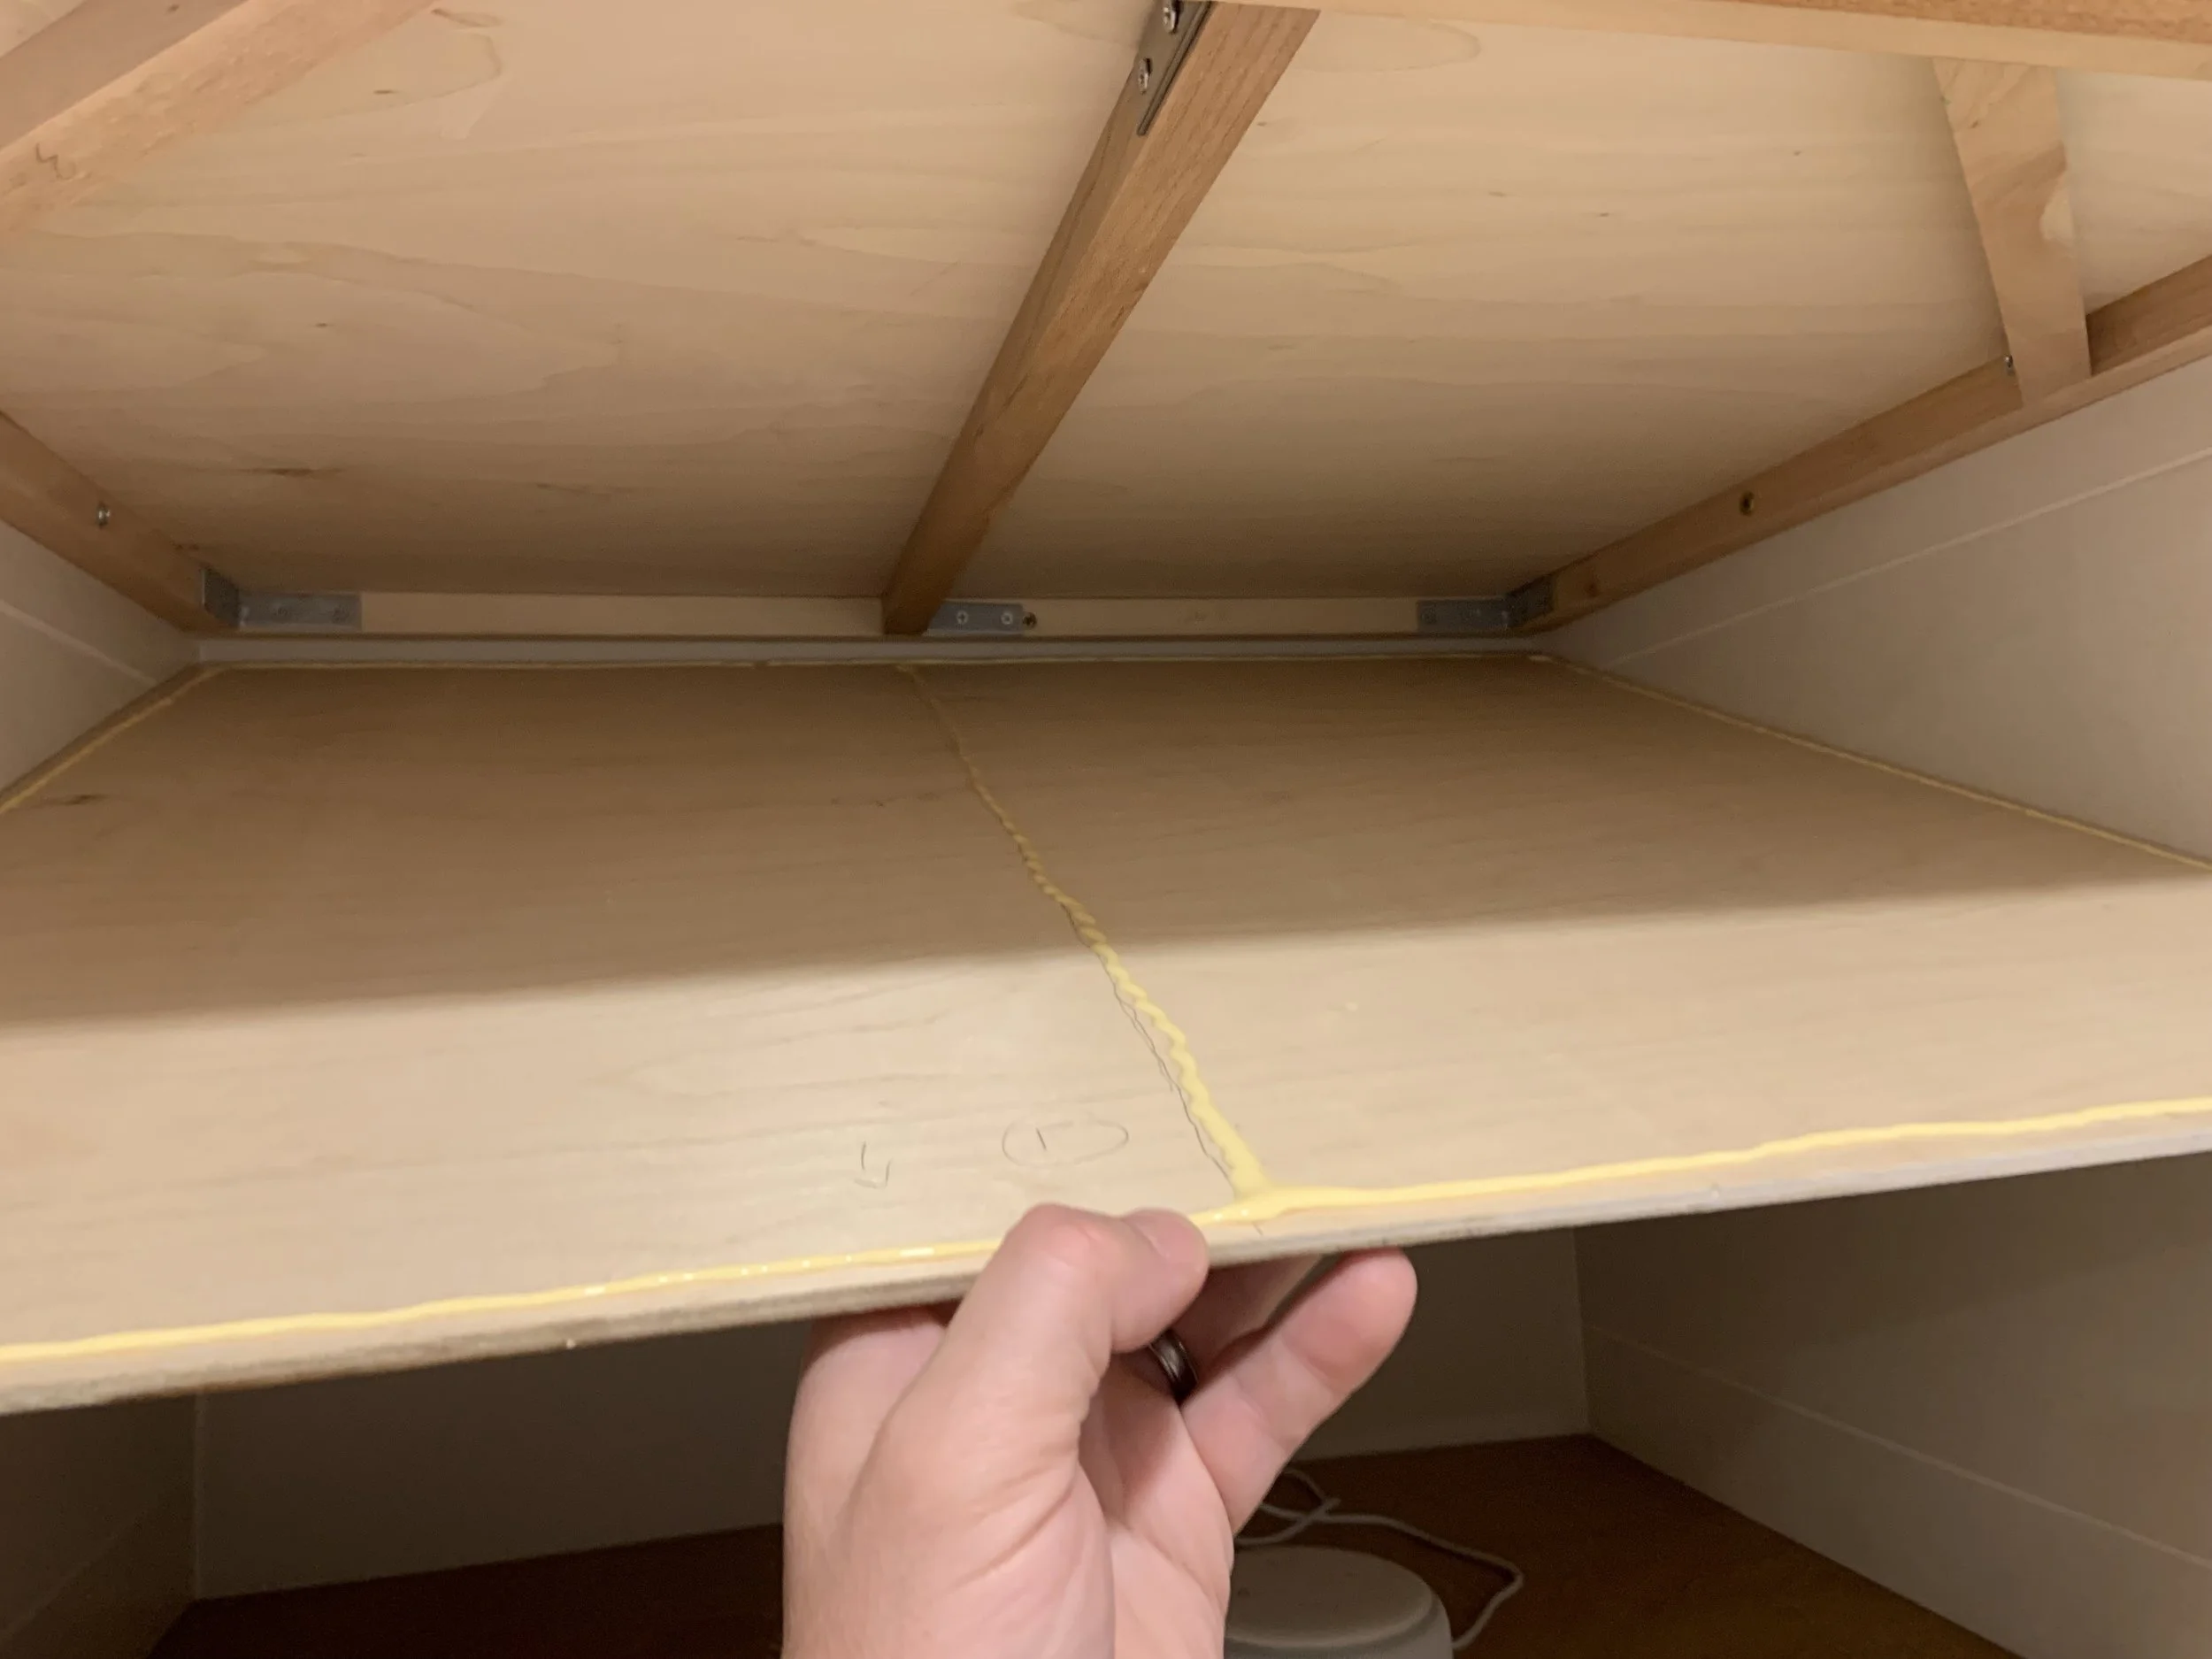
Then 1/8 inch birch ply was glued to the bottom since the bottom of the shelves are exposed.

Once they are in place all the wood got two coats of polyurethane to keep moisture out. The teak however is left uncoated as the natural oils are allowed to breathe and protect

One final detail is the return trim on the floor. We originally were going to use matching wood but decided to use the extra Travertine instead.

The final result is a spa like, peaceful, Japandi style bathroom - the only original piece remaining is the tub.

Looking at the shelves from the shower through the glass divider

And the shower from the bathtub through the same glass divider. The opening at the top allows steam/moisture to escape

We added a plant along with ceramic bottles for soap and lotion to match the mirror and faucet hardware

Black doorknobs on the refinished original wood doors match all the black trim in the room.

Including black towel hooks, a toilet paper stand and a cool knotted ball as a door stop. Which Cato thinks is a toy, of course.

Our raised shower head with shower mood lighting emphasizes the spa like feel.

We replaced the original glass shower door with a softer natural linen shower curtain. We love the bigger shower niche

And the open shelves allow us have necessities easily accessible.